Garlic Planting
17 Nov 2015(First, go read yesterday’s post about Garlic Prep)
24 hours after breaking the garlic bulbs into cloves and setting them to soak, it’s time to plant the garlic in the garden.
I actually started soaking my garlic on Sunday, and it’s Tuesday now. So it’s been more than 24 hours, and I am once again behind. Things will still be fine. Planting and gardening is not really a precise science.
Spacing The Garlic
Looking back at my garden journal, in the past I’ve planted garlic as tightly as three inches apart, and as far as eight. The closer you plant the cloves the less room they will have to grow into big bulbs, and they’ll need more water. Farther apart and you’ll need to weed more, and it’s not like the garlic will grow a foot wide if you give them that much space. Four inches seems to be a happy medium, and what I’ve used most often in the past.

I’m using a 3-foot by 8-foot garden bed this year for the garlic. Four-inch spacing means 24 rows of 9 cloves. That’s room for 216 cloves in this single bed, and that is a lot (a LOT) of garlic. The two pounds of garlic I cleaned and soaked a day ago gave me 106 cloves. They’re also extra large cloves, so I’ll loosen up the spacing a little more so the cloves have room to grow — 4 inches between cloves, and 5 inches between the rows. That will fill a large portion of the bed with the cloves that I have, with some extra space as well.
Garlic doesn’t care if it’s planted in neat orderly rows, or squares, or diamonds, or spirals, or smiley faces. You can stuff it into the ground roughly 4 inches apart and it’ll grow. I like rows because nerd. It’s more organized that way.
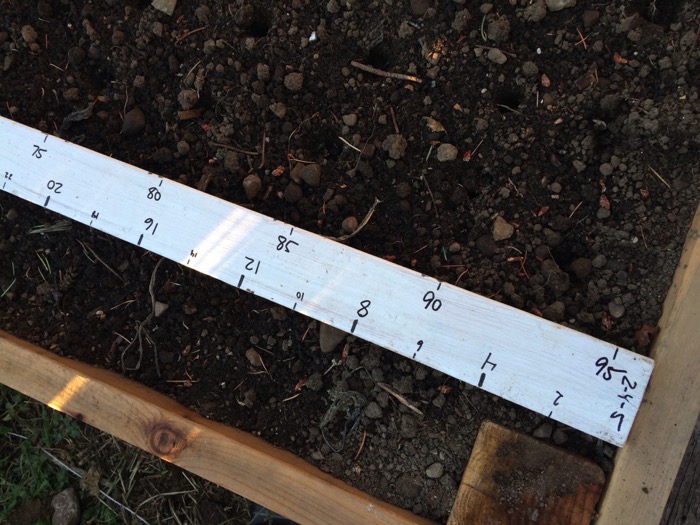
To keep track of spacing for planting my beds I made this enormous ruler. One side is marked in 2, 4, and 5 inches, and the other side has 3, 6, 8, and 12. It’s eight feet long so it fits neatly into the bed for measuring, and helps keep the rows straight.
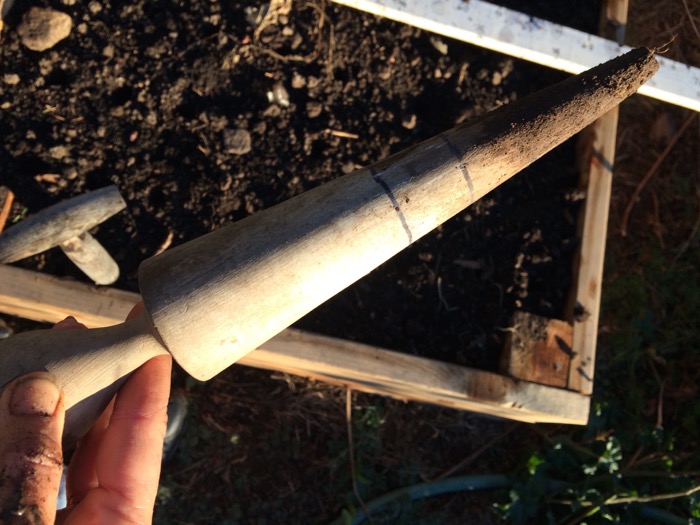
This is a garden tool called a dibble or a dibbler. It is useful for poking holes for planting individual seeds — or planting garlic cloves. I have marked it in 1-inch increments so that I know how deep to make the holes.
(Technically, this is not a dibbler at all. This is actually the pestle from a cooking sieve called a chinois, which I got in a random box of old kitchen stuff I picked up somewhere ages ago. But I use it as a dibbler.)
I use the dibbler first to mark the planting locations in rows for the garlic, and to make sure I have my math right for the spacing. I’ll use it again to actually put the cloves into the ground.
Interlude, with Turkeys
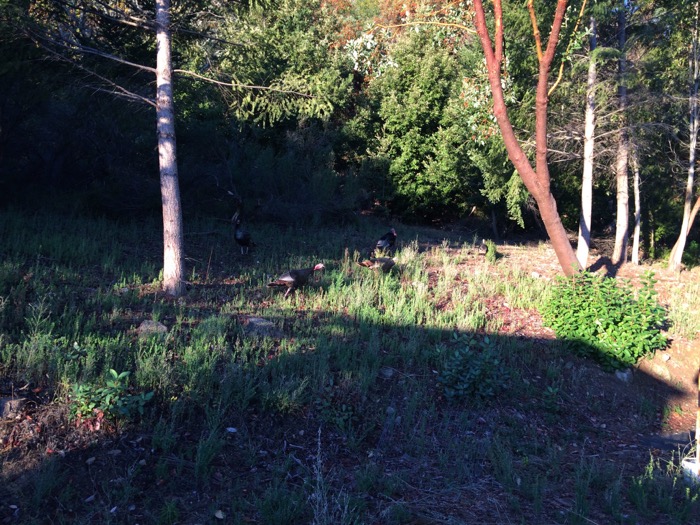
While I was marking rows in the garden and taking pictures for this post, this flock of wild turkeys came by to watch. I did not know they were there until they suddenly all gobbled at me at once. I was so startled I think I lost a full year off my life.
Planting the Garlic
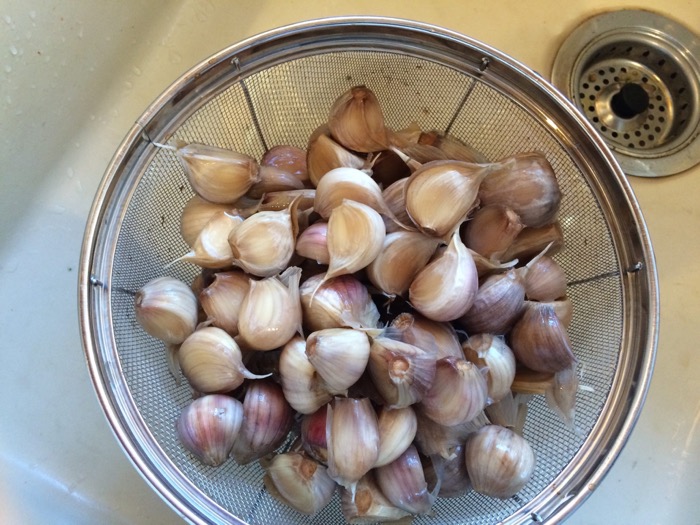
The garlic has been soaking in the baking soda and seaweed solution overnight, or in my case for close to two days. Drain the garlic in the sink. You’ll notice that the skins are really loose on the garlic cloves, and may have come off altogether. That’s OK; you can even plant the cloves without the skins at all and they’ll still do fine.
Part two of the soaking strategy involves rubbing alcohol for a final short disinfection. I haven’t ever done this before, so I have no idea if it will make a difference at all, but I’m willing to try.
I put the garlic back into the soaking container, add half a bottle of rubbing alcohol and water to cover. Shake to distribute, leave for a couple minutes, and then drain again. Now we’re ready to plant.
I haven’t done anything special to the soil in the garden bed to prepare it for garlic. Garlic likes loose soil, and it likes some extra phosphorus. If my soil was in poorer condition I would have added bone meal and a bunch of compost when I dug the bed. But this soil came from another bed in the garden, and it is already in good condition and pretty fluffy.
You can plant garlic anywhere from 1 to 3 inches deep, depending on the size of the cloves. If you’re planting smaller cloves and your soil is fluffy you can just press them into the soil with your fingers. (The first joint on my thumb is almost exactly 1 inch, which is awfully convenient.) Because these are big cloves I used the dibbler to poke 2-3 inch deep holes and then dropped in the cloves.
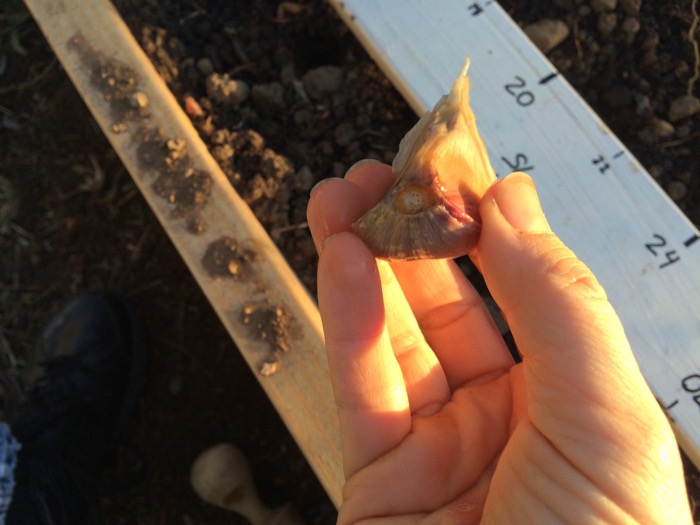
You do want to plant the cloves root side down, and pointy side up. These cloves have very obvious root sides and pointy sides, but sometimes with some softneck garlic cloves it can be harder to tell. If you plant them upside down or sideways they will grow but it’ll take longer for them to figure out which way is up, and you’ll probably get smaller bulbs. This somewhat unfortunate picture that looks like something else entirely shows the root end of the clove.
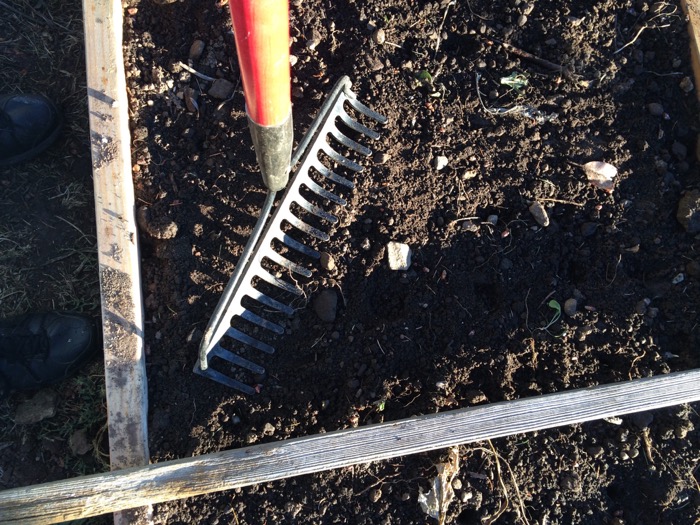
After all the garlic is planted, I press down the soil lightly to make sure that there is good contact between the soil and the cloves. You can just use your hands for this, but I use a rake.
Mulching the Garlic
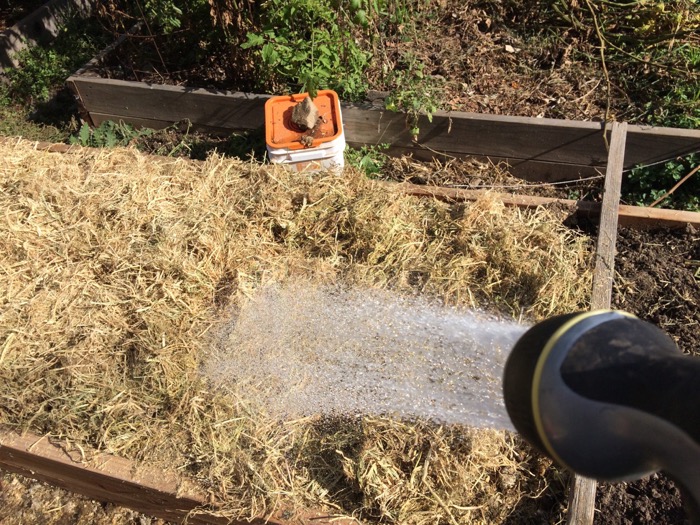
The final step is a thick layer of mulch on the garden bed — two to three inches of mulch. The mulch helps preserve moisture in the soil, protects the new garlic shoots from the freezing over winter, and also prevents marauding birds from noticing that your garlic is sprouting, mistaking the sprouts for worms, and yanking all the cloves out of the ground. (Don’t ask me how I know this happens.)
For mulch I’ve used leaves, straw, pine needles, or compost, depending on what’s available in my yard at the time. This year I used some composted chicken litter (I have a LOT of chicken litter) and a layer of straw. The chicken litter is high in nitrogen and will help fertilize the garlic as it grows, and the straw is just mulch. All you have to do is lay it on, and water it down.
Normally when I plant garlic I also put in the irrigation lines, underneath the mulch. If we get rain this year I won’t need to water the garlic until the spring, but it’s good to put in the lines before anything sprouts and makes it more difficult. Putting the lines under the mulch helps preserve water later in the year. However, this is a new bed, and I haven’t run any of the lines at all yet. I’ll have to do that later on in the Fall or Winter when I get around to it.
And that’s the job done. Other than peeking under the mulch occasionally the winter to see if things are sprouting, there’s nothing else to do with the garlic until sometime next Spring.
Posted on 17 Nov 2015 • in blog •