05 Jun 2016
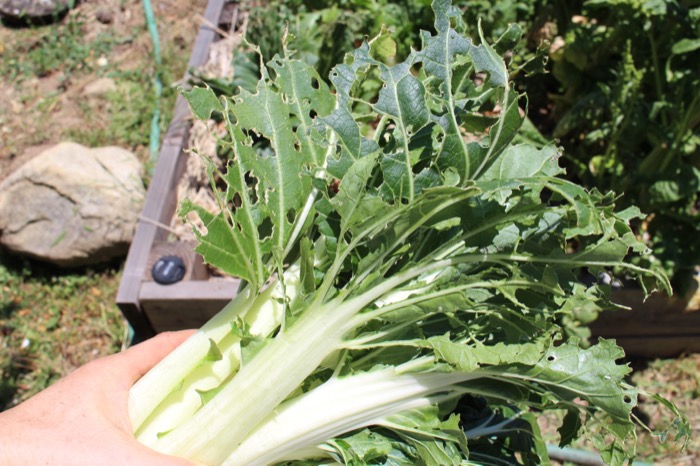
No vegetable garden is perfect every year; there’s lots that goes wrong. In the interest of honest garden blogging here is a good-sized head of bok choy that was nibbled to death by bugs. And if the other heads of bok choy I harvested yesterday are any indication, it is also probably completely full of earwigs.
Fortunately vegetable garden failures can all be recycled via the chickens into eggs.
04 Jun 2016
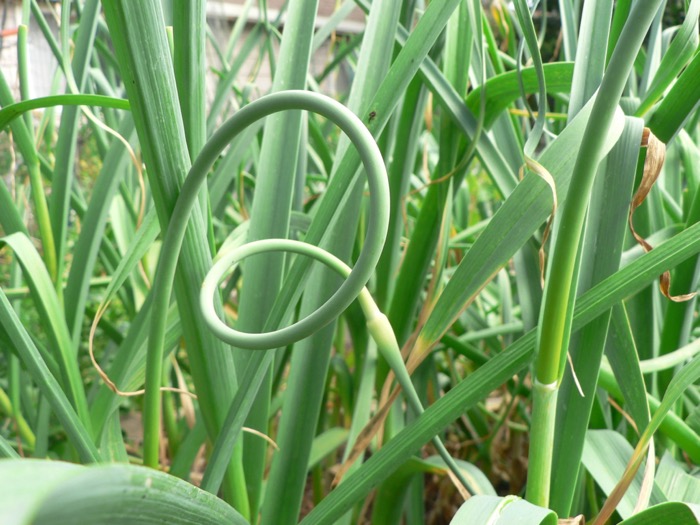
A garlic scape is the young flower bud from a garlic bulb. As the garlic matures the scapes peek out from the plant, stretch up, and then curl around in spirals as they grow.
Scapes are pretty and interesting to watch as they grow but they draw energy from the garlic plant, and you want the plant to put that energy into the bulb, not the flower. So the scapes have to go, preferably as early as possible. You can snap them right off the plant or clip them with scissors. (that picture up top is from a bunch of years back when I let them grow a little too long.)
The scapes do not go to waste, however. They are totally edible. They have a milder flavor than bulb garlic, but can still be used in place of garlic in any recipe. And since last year’s garlic is getting on in age, but this year’s garlic isn’t ready yet, its nice to have something garlicky in the house.
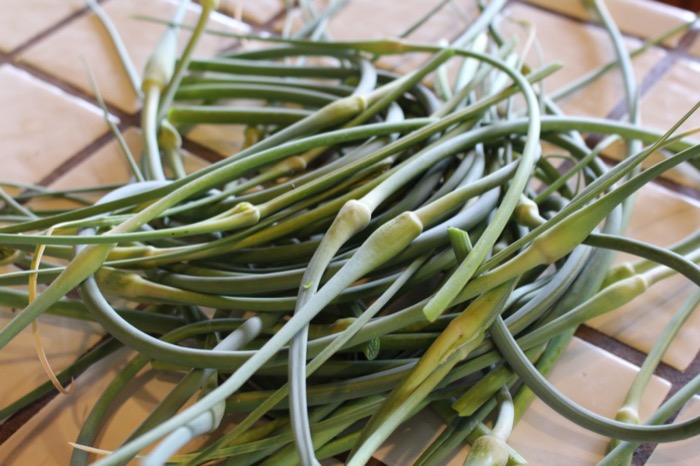
I have a lot of garlic in the garden, so there were a lot of scapes to pick. Normally I just wrap them up and put them in the fridge and use them as I need them — they last a long time — but I was thinking I might make a garlic pesto with these.
How is the actual garlic growing, you ask? Well…
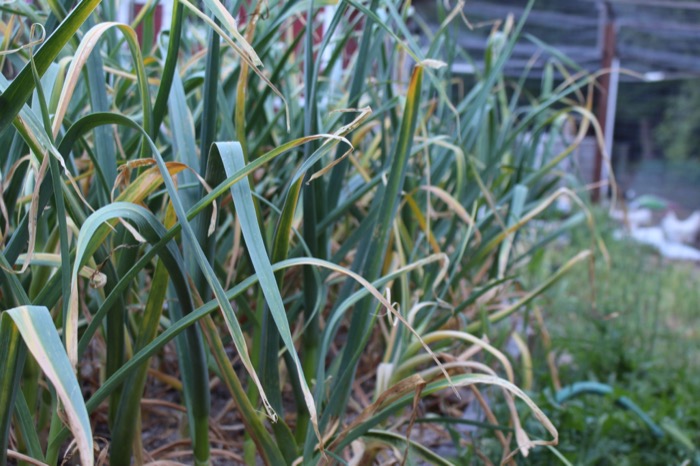
I’ve had a lot of trouble the last few years with garlic bottom rot; the plant will grow just fine and then wilt and die and when you pull it up it’s all mushy and gross on the bottom end. Best as I can tell from The Google this is because of a fungus in the soil that is extremely difficult to get rid of.
In an attempt to stave off at least some of the rot this year I’ve been keeping this bed pretty dry, which means the leaves are starting to die back and it all looks kind of ugly. But there are good-sized bulbs under the soil ready to go, and it’ll only be a few weeks before I can harvest it all. Good thing, too, because I have sweet potato plants coming in next week to fill the space.
11 May 2016

Compare this on-the-roof overhead pic to April’s. Things that happened this month:
06 May 2016
I’m working a temp gig right now at a large Silicon Valley tech company whose name you know well, and that you will probably be able to guess easily from this post.
The company campus in Mountain View where I work is very large and sprawling, and it can take a good amount of time to walk between buildings for meetings, or to get to or from the stops for the company shuttle I take to work every day instead of driving. It’s good to get some exercise at work, of course, but sometimes it can be a LONG walk.
The preferred way to get around the campus without a car is to take one these bicycles:
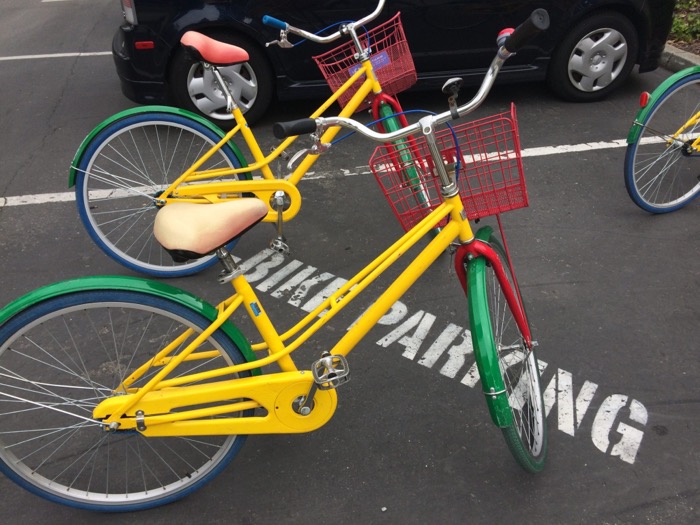
The bicycles are scattered all around campus. Anyone can pick up a bike where it is available, and leave it at their destination for someone else to use later. The bikes are heavy and clunky and cheap, and painted in garish colors, so presumably that discourages theft. It’s a system that seems to work fairly well. So really, I should be breezily tooling all over the place on these bikes all the time like everyone else does.
But.
I used to ride a bike a lot. I had a shiny red Italian road bike that I rode around on the weekends, on and off the street, all around the quieter parts of the Valley. I was on that bike nearly every weekend. I did Bike to Work Day one year — 30 miles worth! I did (metric) centuries. I got involved in bicycle advocacy. I lost 15 pounds.
And then one day ten years ago I crashed that bike, on a wet road, in the middle of San Jose. I turned my head to check for traffic as I was making a left turn, and the next thing I knew I was being picked up off the pavement by a family who happened to be driving by. I still don’t know why I crashed. My shoulder hurt for years and still occasionally complains. I have an ugly scar on my left thumb. I stopped riding soon after that crash, and I haven’t been on a bicycle since.
Last week I got on one of the campus bicycles at work, and I’d like to be able to say that I ended up breezily tooling all over campus. That riding a bike was was just like it used to be.
But actually I got on that bike and completely lost my shit. I wobbled slowly once around the parking lot and then put the bike back. My heart was pounding in my ears, my whole body was shaking, and I wanted to lie down on the ground and cry for a while. Apparently I have ten-year-old unresolved bike crash PTSD. Awesome.
But the next day I got on the bike and I rode twice around the parking lot. The day after that I got on the bike and went out onto the street into traffic and rode down to the lunch cafe I like — and I put my lunch in the basket and I rode back again. The day after that I got on the bike and went all the way down to the end of the street, and I put my arm out to signal for a left turn, and I turned to look for traffic to make sure it was safe, and I made that left turn. And yesterday I got on the bike with my big heavy backpack, and I rode around the parking lot a few times that way. My plan for next week is to work on riding through the busy intersection, and then I’ll work on the tight turns and the hill up to the shuttle.
It sounds idiotic, I know, all these tiny, tiny, incremental steps of effort I’m making to do something so basic, so simple, that so many people can do with their eyes closed. Something that I could do myself easily, before I crashed.
But I am OK with being that idiot, with taking those tiny, tiny steps. I am a little better and a little less anxious every time. I am getting back on the bike. I am literally getting back on the bike.
18 Apr 2016
Rather than write a lot of stuff about every plant in the garden for April (and possibly bleed well into May) I went up on the roof and took a picture.

14 Apr 2016

13 Apr 2016
(March Garden Update Pt 1 here)
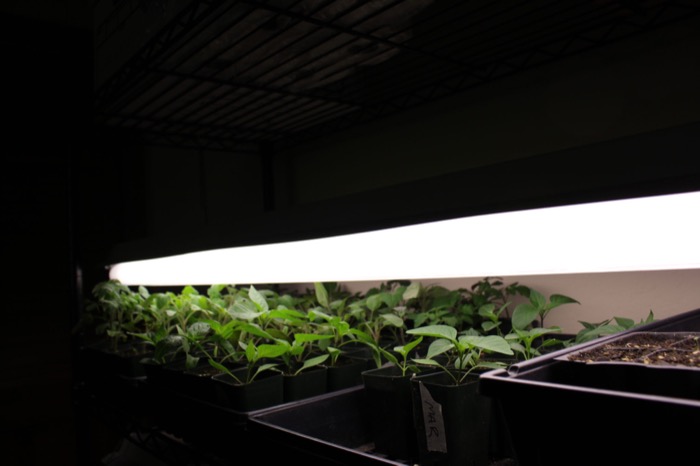
I’ve gotten really good at growing both tomatoes and peppers from seed. The biggest hassle is that they have to be started well ahead of when you plant them into the garden, which means getting the seeds into soil in February or even earlier, and then growing the plants indoors for a while under lights.
I always start some extra plants for both tomatoes and peppers as a hedge against disaster. I’ve had more than one year where rodents or late snow or early heat struck my seedlings and I was left having to fork over cash for store-grown tomato and pepper plants. This offends me. I try not to buy plants.
A couple of years ago when I had extra plants I started giving them away to the neighbors. And then I figured that it’s not that much more work to grow 60 plants than it is to grow 15, and my neighbors have all turned into tomato gardeners. I figure since I keep a rooster who starts shouting about how awesome he is at 5AM every day, it’s the least I can do.

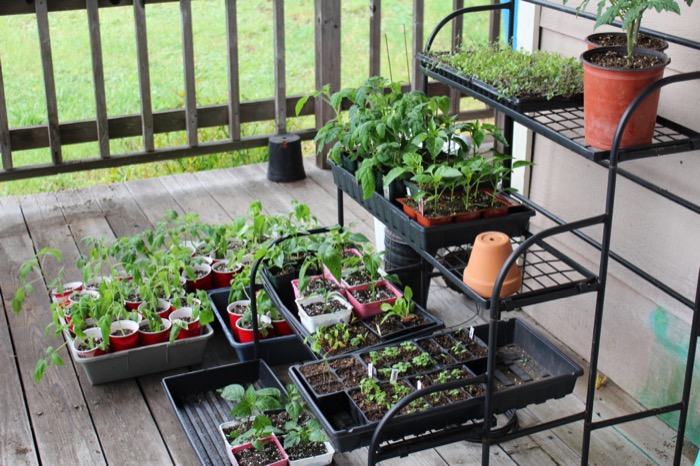
Over the last week I moved the tomatoes and peppers out from under the lights onto the porch and I’ve been busily repotting them — Solo cups for the giveaways, and gallon pots for me. The weather has been nice and from the forecast it looks like it won’t drop below 50 degrees overnight for the next week, at least. Neither tomatoes or peppers like the cold so if the temperature drops again I’ll bring them back inside.
Tomatoes
I usually grow two beds of tomatoes – one for the canners (eight plants) and one for the eaters (six plants). That’s usually more than enough tomatoes for us to eat and put away, with some extras to share.
Tomato varieties for this year:
- San Marzano, San Marzano Lungo: My standby canning tomato. I prefer the larger and more vigorous Lungo variety — fewer tomatoes to peel for the cans — but I have seeds for plain San Marzano that I’m trying to use up.
- Sungold: My standby cherry tomato, super productive. Tons of tiny sweet orange tomatoes. If I could only grow one tomato, it would be this one.
- Reisentraube: Red cherry tomatoes, and lots of them. Very reliable.
- Costoluto Genovese: A big lobed red tomato with really good flavor. One of the prettiest red tomatoes.
- Marmande: A big beefsteak tomato, one of the best tasting ones I grow, but not all that productive.
- Glacier: cold-tolerant, will bear small tomatoes early and well into winter. The tomatoes themselves are kind of boring but it’s nice to still have tomatoes after everything else is done.
- “stripe”: I don’t know what variety this actually is. I bought a red and orange striped tomato from the farmer’s market last year because it was so pretty, and I saved the seeds. I haven’t been able to figure out what variety it is no matter how much googling I do. If it’s a hybrid it likely won’t grow the same tomato I bought, and it could be something else altogether (but still a tomato.) We’ll see.

This year I’m also trying an experiment with dry-farmed tomatoes, and I have two early girl plants set aside for that purpose. I’m going to just stick them in the ground and see what happens. I expect this will be a short-lived adventure in the fastest method of killing a tomato plant, but I’ll save that adventure for another post.
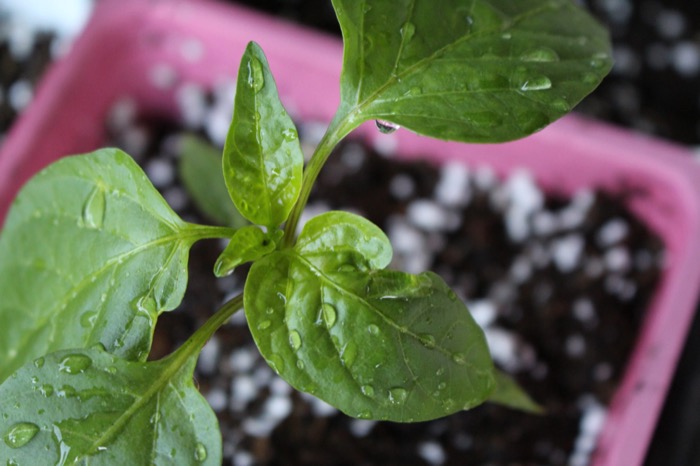
Peppers
I grew a lot of peppers last year, and I’m growing a lot of peppers this year. This is another case where I had too much of something last year, so I figure I’ll grow more this year because, ¯\(ツ)/¯
I have 24 plants ready to go, although some of my seeds didn’t germinate that well. Pepper seeds get too old faster than I expect them to, and I’m left without pepper plants that I really wanted. I had to supplement with extras from the garden center.
Pepper varieties:
- Jalafuego: A dumb name for a good Jalapeno hybrid. Grows lots and lots of really big fat jalapenos. I’m almost definitely growing too many of these this year because I’m still working through the frozen ones from two years ago, but Jalapenos are easily give-away-able.
- Tiburon: A poblano hybrid. Poblanos are my favourite peppers, and we eat a lot of chile rellenos in the summer when they’re ready. This variety grows extra large peppers that are more abundant and wider at the stem than normal poblanos, so they’re better for stuffing.
- Pimiento di Padron: super popular foodie frying peppers. I stopped growing these for a while because if you don’t pick them tiny they turn super hot. I actually prefer a frying pepper called Melrose but I’m using up the seeds.
- Marconi: The standard italian red and yellow sweet pepper you get in the jars of roasted peppers. I grew these a few years back and they didn’t bear very well, but I have some enormous number of seeds so I’ll try again.
- Sweet Red Bell Peppers: My usual spanish mammoth peppers did not germinate at all so I bought a six-pack of completely ordinary red bell peppers to replace them this year.
You may notice that the Japalenos are the hottest chiles I grow. There are no Habaneros or Scotch Bonnets or Bhut Jolokias here. This is mostly because I just can’t take super hot chiles (I recognize and accept this weakness). If I change my mind and want a super hot chile there are lots of them in the farmer’s markets. I may plant too much of a lot of things, but I’m hesitant to give over garden space to something I can’t actually eat.
This is always the busiest part of the year for me for gardening, and the time of the year I feel like I’m repotting tomatoes and digging up garden beds in my dreams. But it’s really gratifying to see trays and trays of happy seedlings out on the porch, and I know if I keep plugging away at it the work will get done. Only a couple more weeks now and everything will be planted in the garden and growing, and I can take a little rest before harvesting season.
07 Apr 2016
The good news is that I am no longer behind in getting all my seeds and plants started or into the garden. The bad news is that I’ve started a new writing gig and I’ve fallen behind in blog posting instead. So here is the garden update for March, posted in April.
Onions, Garlic, Leeks

I ordered onion plants from Johnny’s in February. The variety is Patterson, a yellow onion, and they come in a bundle in a box in the mail. This is the same variety I grew last year, and they’re a good onion — they grow into big bulbs that keep a long time. I like mail-order onion plants a lot; they are easy to put into the ground (make hole, drop onion into hole) and seem to reliably take root and grow on their own.
I also bought a 6-pack of red onions when I was at the garden center, and planted those next to the yellow onions. There were more plants than I thought there were going to be in the one 6-pack, so I guess I’ll have a lot of red onions. I also impulsively bought a 6-pack of leeks on another garden center trip (I visit the garden center a lot at this time of year) and those need to be planted in this same bed as well. I don’t really eat that many leeks, but if I have leeks I’ll find a use for them. (I didn’t eat that many shallots either until I accidentally grew 20 lbs of them last year).
The garlic is still doing well and the garlic plants are now about a foot tall. I also filled up the remainder of the garlic bed with a couple shallots and some left over onion plants that I’ll use for scallions.
Broccoli & Other Brassicas
Last year’s broccoli has stopped forming little heads and the ones it does form go to flowers almost immediately. It’s time to pull those plants out and give them to the chickens. I got pounds and pounds of broccoli out of these plants right up until last month, so I’m OK with letting those go.
I never got around to planting broccoli seeds this year, so I bought some started plants on one of my garden center runs. I planted two varieties: Gypsy and Green Magic, both hybrids. I had 6 broccoli plants last year and nearly too much to eat, but this year there are 12. I’m figuring on freezing a lot.

Right now these plants are looking really purple, and I’m not sure why. My friend Google would indicate either a nutrient deficiency or it’s just been too cold. These plants are due for a dose of seaweed fertilizer and the weather’s getting a lot warmer, so we’ll see if I can’t green them up.
I did seed some brussels sprouts earlier last month and they came up very well, I planted those into the garden at the same time as the broccoli. Brussels sprouts are kind of troublesome for me — I can grow huge plants but get really small sprouts, and they’re plagued by bugs. But hope springs eternal and we’ll see if I can’t coax some real sprouts out of them this year.
I’m not growing cauliflower or romanesco. We eat a lot of cauliflower, but it needs a lot of space and water and you only get one head per plant. You also have to cover it in order for it to be white, and it has a lot of bug problems, and it’s picky about the weather. Too much trouble, better to just give over the space to more broccoli and buy cauliflower in the store.
Roots & Shoots
I’m still eating carrots and beets from last year (I planted too many of them, and have not been eating them fast enough). The carrots are starting to sprout flower stalks, and some of them are a good three inches across at the crown, but they’re still edible. (they are especially good as ginger pickles) The beets are large and woody but the greens are still good.
I started planting this year’s carrots and beets a week ago. These will be multicolored carrots (orange, white, purple), as well as chioggia (pink striped) and yellow beets.

I planted peas in just about every bed as a cover crop, to add more nutrition to the soil. Peas are a nitrogen fixer, which means they suck nitrogen out of the air and store it in little nodules in their roots. If you cut down the pea plants you get the benefit of that extra nitrogen in the soil, and you can compost the greens. I haven’t been very good about cover cropping in the past and it’s something I want to try to improve — it’s always better to grow better soil in place than to add stuff every year to improve it. I probably won’t get any actual peas out of these plants before I cut them down, but every little bit of benefit to the soil counts.
I also planted snap peas, but either they did not sprout or they did and birds got them. Could go either way. I’m thinking of planting more seeds but it’s getting late in the season — Snap peas don’t do well when the weather is too warm.
Greens
Sometimes when I read other people’s garden blogs I get depressed because it seems like everyone else has fabulous gardens and everything they plant grows well and looks terrific. It finally occurred to me that no one posts about their failures, so you get a rosier picture. So. I planted a whole bed full of spinach seeds and watered them and protected them from birds and none of them came up. This happens every year. I don’t know why everyone says say that spinach is one of the easiest vegetables to grow. I suck really hard at spinach.

Kale and chard are started and ready to plant, but I haven’t put them in the garden yet.
Up next: tomatoes and peppers!
11 Mar 2016
A little while ago I made a traditional French Coq au Vin, or at least as traditional as I could find from browsing old cookbooks and spending some time with my friend The Google.
(Skip to Recipe)
The History
Coq au Vin is a French dish that is, most simply, a chicken stew in red wine sauce. It’s a very old recipe that supposedly dates all the way back to roman times, although the only written examples seem to be from the 1900s on. When I started my research I found dozens if not hundreds of variations on the recipe. Some had aromatic vegetables, some had onions and mushrooms, some had brandy or cognac, some had the chicken cooked in the sauce, and some had the chicken and the sauce cooked separately and then served together.
The one key thing that is generally understood about traditional Coq au Vin, however, was that it was supposed to be made with a farmyard rooster (hence the “coq” (cock) – and not “poulet” (chicken)). In Ye Olden Tymes if you kept chickens, a batch of new baby chicks hatched in the springtime. Assuming the normal chromosomal distribution in that batch you would get half hens and half roosters. But a small flock of chickens does not need more than one rooster — in fact, more than one is generally a bad thing because they fight — so after raising up the roosters over the summer, in the fall and winter you would kill them and eat them.
The meat of older chickens, be they 6-month-old roosters or even older laying hens, is super tough. All the moving around in that time doing important chicken things (chicken staff meetings, chicken progress reports, chicken analytics, chicken sprint review) means that their muscles are denser and the connective tissue is hard and stringy. The chickens we buy in parts in the supermarket today are no more than a couple months old, and they don’t move much in their short lives. That’s why they are so tender. They are still babies.
The traditional coq au vin recipe involves braising a rooster in wine and stock for a really long time to break down the tough meat and connective tissue and to soften it up. That long braising time is how you actually make an old rooster edible. The long braising time also reduces and enriches the wine sauce. The long time to cook is part of the entire point.
Modern coq au vin recipes have been adapted to the new modern chickens, given that it is essentially impossible to buy old roosters or hens. But modern supermarket chickens only need half an hour or less to cook. Any more and you end up, ironically, with dry and tough chicken. Half an hour cooking time gets the food on the table, but isn’t really enough time for the wine sauce to really come into it’s own, flavor-wise. Modern Coq Au Vin recipes may be chicken stew in wine sauce, but are they really Coq au Vin?
If I wanted to make a truly traditional Coq Au Vin, I would need a farmyard rooster.
The Prime Ingredient
As it happens, I had a farmyard rooster.
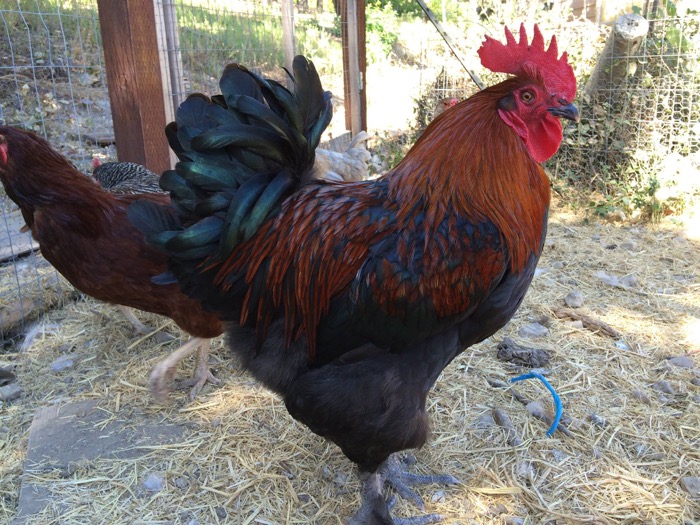
This is my #2 rooster, from some Marans eggs I hatched last year. There were actually four roosters, and two of them went into the freezer when they were much younger. I didn’t whack the #2 rooster because he was pretty and because for the most part he got along with the #1 rooster and with the hens. Mostly I put it off because I just don’t like doing it.
But then a month or so ago he started to get much more aggressive. He got into many more regular spats with rooster #1, and a few weeks ago he came up behind me when I wasn’t watching him and kicked me really hard. All of these were signs that it was time. No one loves an extra rooster, and a mean extra rooster is the worst of all.
Fade to black. #2 Rooster is no more. #2 Rooster has ceased to be. #2 is bereft of life, he has shuffled off this mortal coil, he has joined the choir invisible. #2 is an ex-rooster.
The Prime Ingredient, Later On
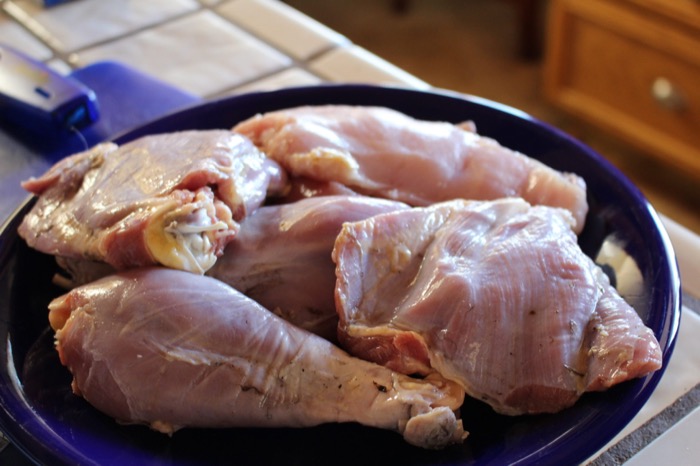
This is what the meat of an older chicken looks like, after it has been cleaned and pieced. There is no skin on these parts because plucking the feathers off of a chicken takes forever, and you don’t really need the skin for the stews and braises that older chicken needs. It’s easier and faster to just skin the bird and be done.
The connective tissue around the meat is notably thicker here than on a young chicken. Note also that the thighs and legs are really dark and really red, much more so than a supermarket chicken. This is both because the age of the chicken as well as the breed — supermarket meat chickens are bred to be lighter in color and milder in taste in all parts because generally people like white meat much more than they do dark.
The little black bits you see here and there are feathers, some of them quite thin and hair-like. I remove most of the feathers with the skin, but it’s hard to get rid of them all. They look kind of ugly, but they don’t harm anything. These tiny hairs are on supermarket meat chickens, too, but usually you can’t see them because meat chickens are white.
Compiling the Recipes
Initially I figured I could just use Julia Child’s recipe for Coq au Vin in Mastering the Art of French Cooking and be done with it. You can’t really go wrong with Julia. I was somewhat dismayed to discover that in my copy of Mastering, even Julia’s recipe calls for a normal young meat chicken, and cooks it for only 30 minutes.
With some more time spent on Google I determined that other than variations on vegetables, herbs, and other ingredients, the core of the recipe for Coq au Vin was mostly the same between the older and newer recipes – the only big difference being the time the chicken spent cooking in the red wine sauce.
My plan, therefore, was to actually stick with Julia’s recipe in terms of the ingredients and proportions, but go with a longer cooking time. Easy peasy.
Building the Stew
Coq au Vin is all about the chicken, but it also always includes a cured pork product. Traditionally this is lardons, which is just lightly salt-cured pork fat. I was all out of pork fat. (if you had asked me last year, I would have had some, but I made lard out of it.)
Second choice for the pork was bacon, but I was worried that the strong bacon flavor would overpower the dish (not all bacon is good all the time). I settled on pancetta, which is cured but not smoked pork belly. Pancetta is a lovely thing.
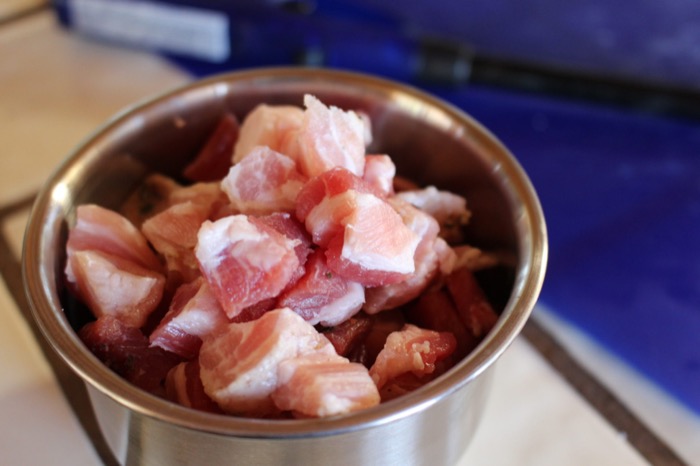
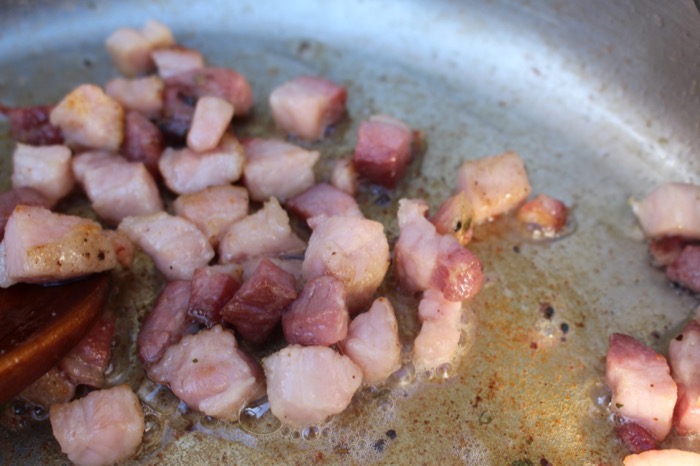
I fried up the pancetta with a big knob of butter in a nice big pan until it was nice and browned.
Then I removed the pancetta and added the chicken pieces, browning them on all sides.

Next I added about 1/4 cup of cognac. I was supposed to light the cognac on fire to burn off the alcohol, but it wouldn’t light, and after a few tries I gave up. Is the flaming thing just a gimmick? If the Coq was going to cook for a couple of hours I imagined the alcohol would be long gone by then.
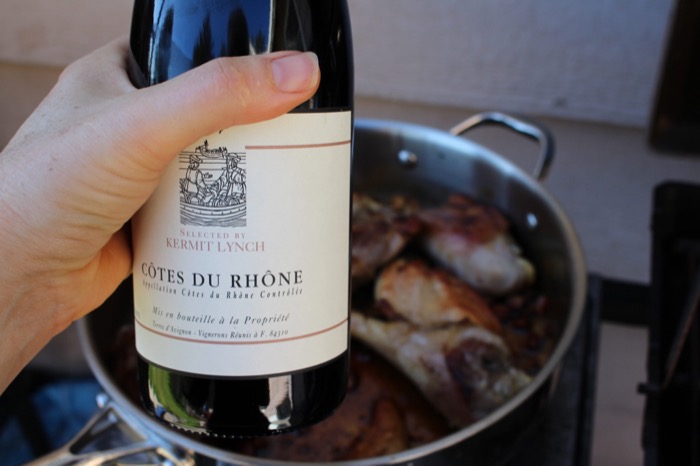
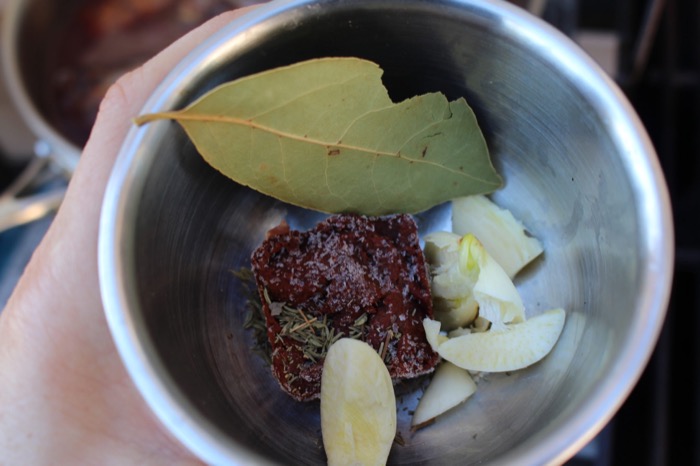
The cognac helped to deglaze the pan, and gave the sauce a really deep sweet aroma. I added a whole bottle of red wine (the recipe called for 3 cups, but that was already most of the bottle, so what the hell), some chicken stock, and a handful of aromatics (tomato paste, bay leaves, thyme, crushed garlic, salt and pepper).
And then it was time to cook the coq for a couple hours at a very, very low simmer.
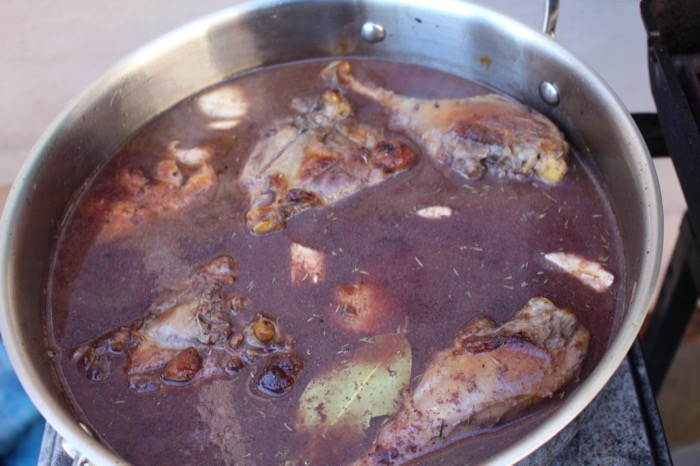
Bubble, Bubble
I was cooking my coq outside on a burner on my gas grill (long story: vegetarian husband, poor kitchen ventilation). It was difficult to get a truly low simmer on the grill. At best I could get it to a low boil. Both the sauce and the chicken cooked probably faster than they should have, but I checked up on it once a half hour or so, turned the chicken and added water if the sauce had reduced too much.
An hour later the chicken was clearly not done — it was cooked but still tough. After 2 hours, the chicken was soft but not completely as soft as I wanted it to be. After 2 1/2 hours we were nearly there, so I added onions and mushrooms.
Julia’s recipe for coq au vin has an additional side-dish recipe for browned pearl onions and mushrooms. When I started this process I was already somewhat dubious about this part, because the idea of peeling a zillion pearl onions sounded like even less fun than tending a pot at a simmer for three hours. It turns out that you can buy frozen pre-peeled pearl onions by the bag. Score!
When it came down to the time to actually make the onion and mushroom side dish, however, I spontaneously decided that rather than cooking the vegetables separately it would be enough to just toss the onions and mushrooms into the sauce and cook them along with the chicken. That shortcut probably disqualifies this as a truly authentic coq au vin, but at that point in the process I was less interested in 100% true authenticity than I was being done, and eating. So, vegetables into the pot for 20 minutes.
The Final Result
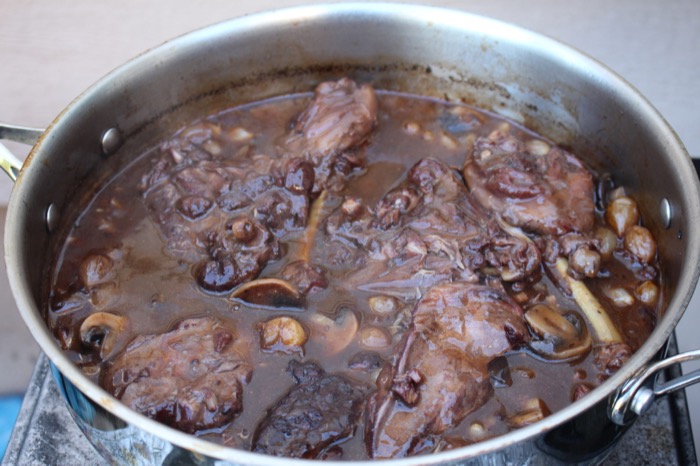
Yum.
The chicken: Tender and extremely flavorful. Not as tender as a modern meat chicken, and cooking it longer would not have made it more tender. Older chicken is just different. Still tasty.
The sauce: thick and intensely wine-flavored, with an underlying fruity sweetness. The pork had dissolved into the sauce during the long cooking time, adding a dense richness.
The vegetables: Perhaps not as tasty as if they had been browned alone, but still earthy and rich.
I ate a nice big bowl of it when it was hot and the rest over the next few days. It keeps and reheats well in the microwave.
Recipe: Laura’s Traditional Coq Au Vin with Real Coq
Based on Coq Au Vin from Mastering the Art of French Cooking (Julia Child, Simone Beck, Louisette Bertholle)
Ingredients
3-4 oz lardons, bacon, or pancetta
2T butter
2 1/2 – 3 lbs cut up older rooster, or stewing hens
1/2 t salt
1/8 t pepper
1/4 C cognac (optional)
1 750ml bottle young, full-bodied red wine (Burgundy, Beaujolais, Cotes du Rhone, Chianti) (don’t spend a lot of money, but don’t cheap out either. $10-15 is fine)
1-2 C good quality chicken stock or beef bullion.
1/2 T tomato paste
2 cloves garlic, mashed
1/4 t thyme
1 bay leaf
1 package frozen peeled pearl onions
1/2 lb mushrooms
1 T flour
2T softened butter
Fresh parsley
Directions
-
Cut up the lardons/bacon/pancetta into small cubes and sauce in the butter in a large heavy casserole until lightly browned. Remove from the pan.
-
Dry the chicken pieces and brown on all sides in the leftover fat. Season with salt and pepper
-
Add the pork back to the pan. Cover and cook on low heat for 15 minutes. Pour in the cognac, and ignite it with a lit match. Shake the pan a little until the flame subside (if it won’t light, don’t worry about it.)
-
Add the entire bottle of wine and enough stock to cover the chicken. Stir in the tomato paste, garlic, and herbs. Stir well and bring to a low simmer.
-
Simmer slowly until the chicken is nearly done but not falling off the bone. This can take 20-30 minutes for a modern chicken or many hours for an old stewing hen. Add more stock if the level of the sauce drops too far.
-
While the chicken is cooking, blend the butter and the flour into a small bowl.
-
Remove the chicken from the pan. Add the butter and flour to the pan, turn the heat up to medium, and stir hard to thicken the sauce.
-
Add the chicken back into the pan, along with the mushrooms and the pearl onions (which can remain frozen). Raise the heat and simmer another 20 minutes until the mushrooms and onions are cooked through.
-
Serve with a dusting of chopped parsley.
17 Feb 2016
When we moved into this house in 1997 there was a small fenced-in area outside the kitchen door that was planted in fruit trees. Over the years I’ve removed all of the fruit trees (most of which never did very well, or died on their own), expanded the fence area, added many raised beds, and built the chicken yard and the chicken coop at the back of the garden. When the time comes to inventory my lifetime accomplishments I can say that I wrote a few books, I blogged a little, and also I built a huge vegetable garden with no help from heavy equipment or any other people.
For the last couple years I’ve been working off of a multi-year master plan to finally finish building the garden. Once a few years back when I was super bored on a Sunday I made this animated GIF:

Since this is 2016, this year’s plan is to move the right-side fence out four feet, and replace two older raised beds with three new ones. This is what I’ve been working on for the last few months instead of starting vegetables from seed.
The two beds I’m replacing this year — the grey boxes in the upper right corner of the plan — are beds I installed in the original garden a year or so after we moved in. Unlike the redwood beds I’ve put in more recently, they are made from chemically treated lumber. At the time I didn’t realize that treated lumber was generally considered a bad idea for growing food. There is some evidence that the treatment chemicals leach into the soil and are taken up by the plants. Eat the plants and you’re eating the treatment chemicals. Not a lot of us have a need for extra copper or arsenic in our diets.
I could go through a long-winded discussion here for why I did this and why it has taken me so long to replace these beds. Let’s just say that I am remarkably good at remaining stubbornly in a huge state of denial.
When I planned this year to replace these beds I was worried that if the treatment chemicals had leached into the soil, this would mean I had to replace both the beds and the soil. I’ve worked hard to improve the soil in these beds, and I don’t really want to throw it all out. So I had a professional soil test done.
Best idea ever. I should have done that years ago, for the peace of mind — the soil test showed completely normal levels of both copper and arsenic, and the same amounts both inside and outside the treated beds. Either the chemicals in the treated beds had not leached in significant amounts, or had drained away over the years. My soil was fine. My plants were fine.
So here’s what I actually accomplished in the last few months in the garden, rather than starting seeds:
-
I emptied one of the two old beds to be moved, and pulled it up out of the ground. It still needs to be broken down and put away.
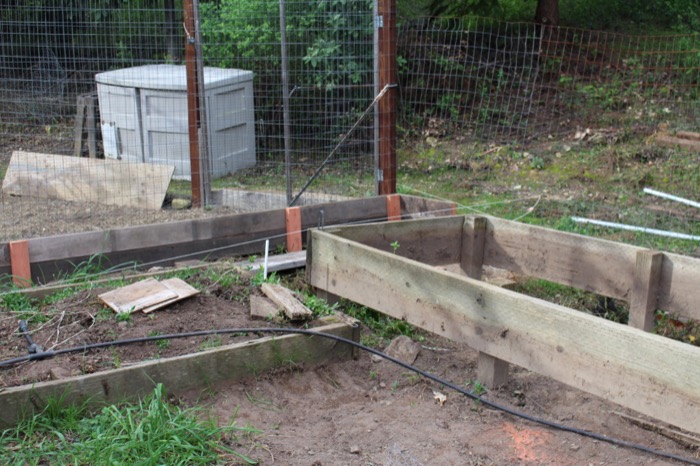
- I pulled up the old fence and moved it out four feet. This also included pulling up a lot of periwinkle vine, which is invasive, has deep roots, and is everywhere. I hate that stuff.
- I pulled two old metal fence posts. This ended up taking much longer than I had planned because apparently the people who put in this fence sank one of the posts right in the middle of a huge rock, and it would not come back out again. I had to chip the post out of the ground.
-
I set this new fence post at the new fence line. There will be a gate here, eventually, but I probably won’t get to putting in the post on the other side of the gate until later this year.

- I started building this long narrow bed at the back of the garden. This will be the asparagus bed. Asparagus is a perennial — you plant it once and leave it there to come up year after year. I’ve always wanted to grow asparagus, but have not had the space until now.

Things I have left to do:
- Finish the asparagus bed. Fill with soil and asparagus.
- Put up the new fence for the new extension.
- Build a gate for the gate opening.
- Move the soil out of old bed #2 and remove it.
- Go buy lumber for the new beds.
- Build the new beds.
- Set the new beds in place.
- Fill the new beds with soil.
And start some vegetable plants from seed, of course.